
It’s rainy and dark outside, and it’s not going better inside: another depressing day at MegaCorpMoneyMaker, the company you’re working for. Of course, you need to debug the 28925th bug of the day; some cursed prices made their way into the database, finally reflecting the real value of the low quality products the company is selling. Your manager, of course, doesn’t see this unfortunate change as positively.
These prices are imported from files you’re fetching from an FTP. You need to search through all these files to find out where the weird pricing is coming from, and you don’t really know how to do that without losing your time (and your mind).
You try to use some search tools, but they’re too slow; naturally, you begin to bang your hands on the keyboard, almost throwing your computer out the window. Davina, your colleague developer, takes interest in your struggle. After explaining your problem, she gives her recommendations:
“You might want to use your terminal to search through all these files. GNU grep could help here, but if it’s still too slow we could try a more modern and faster alternative”.
Davina is right; that’s why this article is about GNU grep and some other, more modern alternatives. GNU grep is already available in most Linux distros, but if you use anything else (like, randomly, macOS), I would recommend you to install GNU grep anyway; it offers many more functionalities than any other grep out there.
You can see if you have GNU grep installed by running grep --version in your shell.
Here’s what we’ll see in this article:
- The general use of grep as well as its syntax.
- How to create some aliases to use grep with colored output and a more robust regex engine.
- How to modify the output: inverting the matches, only output the pattern matched, output line numbers…
- How to display or hides the filenames in the output.
- How to include or exclude some specific files.
- How to output some context (the lines before or after the pattern matched).
- How to pipe grep with other CLIs.
- More modern and faster alternatives to grep.
There is also a companion project if you want to follow along and try by yourself the different commands. I’d recommend you to do so, to remember what we’ll see here, and be able to use grep in different contexts.
Last thing: if you prefer watching a video instead of reading this article, you’ll find one about grep on my YouTube channel in the conclusion of this post, at the end of the page.
Are you ready to dive into the shallow waters of grep?
General Use
As you might know, grep can output all lines matching a specific pattern (a regular expression, or regex) from a text file. It can be used to search some specific information, which can then be piped to other CLI for more processing. As a result, like many CLIs, it’s a fast and powerful tool.
General Syntax
If you look at the man page of grep (something you should definitely do if you want to know more about it, thanks to the command man grep), you’ll get its general syntax as follows:
grep [options...] 'pattern' [files...]
It means that:
- You can give to grep one or more
optionsorfiles(thanks to the three dots...). - Both
optionsandfilesare optional (thanks to the square brackets[]). Instead of files, you can pipe an output to grep. We’ll look at that later in this article. - the
'pattern'is mandatory.
The single quotes I added to 'patterns' are important: it will prevent your shell to expand any glob operators; instead, grep should get your raw pattern without any previous processing. Otherwise, it can lead to nasty side effects you might not see at first glance, but which can screw your output.
Enough rambling. Let’s look at a first example:
grep 'div' styles.css
Here’s the result if you run the command above in the project companion:

As you can see, you get every line containing the regex div as output.
As we’ve seen above, you can use grep to search in more than one file. In that case, each line will be prefixed by the filename where the pattern matches. For example, you can run:
grep 'div' styles.css Makefile
Here’s the result:
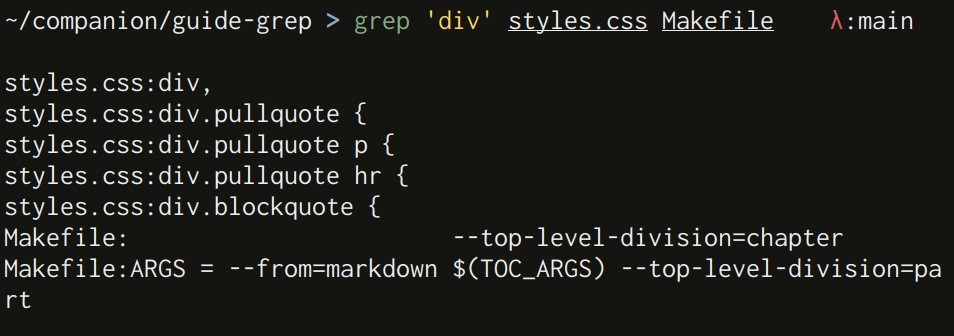
Wonderful! But there’s an inconvenience: you see the whole line where the pattern is matching, but it’s difficult to see the match itself. Also, we don’t really know what regex engine we’re using here; we can solve these horrible problems with a bit of configuration.
A Bit of Configuration
Vanilla grep is great, but we can make it more powerful if we could add automatically some specific options each time we use the holy CLI.
Gimme Some Colors, Please
I would strongly recommend you to always use the --color option when running grep, to emphasize all the information you get in the output, including the exact match:
grep --color=auto 'div' styles.css Makefile
The result:

Now, do you see yourself adding this option each time you want to use grep? Me neither. The best way to solve this problem is to create an alias. Let’s run the following in your terminal:
alias grep="grep --color=auto"
You can also add this line in one of your shell’s config file to always use the option when running grep.
Let’s try to use grep again:
grep 'div' styles.css Makefile
The result:

This is the most beautiful output you’ll ever see in your life.
Remember: to bypass an alias in most common shells (it works at least in Bash ans Zsh), you can prefix the CLI’s name with a backslash \. For example:
\grep 'div' styles.css Makefile
The boring result:

Now, what if you want to let your artistic side express itself by customizing these wonderful colors?
Customizing grep’s Colors
I’ve good news: you can configure the colors in the output thanks to the environment variable GREP_COLORS. Here’s the default value:
ms=01;31:mc=01;31:sl=:cx=:fn=35:ln=32:bn=32:se=36
Difficult to be more cryptic. What’s going on here?
We can split this string into different patterns separated with colons :. These pattern always begins with two letters (called capabilities, basically what “thing” to colorize), followed by equal = and one or more integer, sometimes separated with a semi-color;.
For example, ms=01;31 is the capability ms with value 01;31 (two integers separated with a semicolon). The capability sl is empty here; not like the capability se which has the value 36.
The two integers given to a capability represent the background and the foreground color (or style) respectively.
| Capability | Description | Default |
|---|---|---|
sl | The line where the pattern is matched (the selected line), without the match itself. | sl= (empty) |
cx | The lines where the pattern is not matched (the context lines). | cx= (empty) |
ms | The pattern matched (match in the selected line). | ms=01;31 |
fn | The eventual filename prefixing the selected line. | fn=35 |
ln | The eventual line numbers prefixing the selected line. | ln=32 |
se | Any separator displayed by grep. | se=36 |
That’s great, but what all these integers stand for? The first one is the background color, the second one is for the foreground color (separated with a semicolon as we saw). But it’s not only about colors: the background color can be used to set up some specific formatting too.
Here’s a summary of the different integers you can use; they might not all work however, depending on the terminal you’re using:
| Integer | Description |
|---|---|
1 | Bold. |
3 | Italic. |
4 | Underline. |
5 | Blink (to impress your coworkers). |
7 | Inverse the foreground and background color. |
39 | Default foreground color of you terminal. |
30 to 37 | Foreground colors set up for your terminal. |
38;5;0 to 38;5;255 | Foreground color (256 colors ANSI). |
49 | Default background color. |
40 to 47 | Background colors set up for your terminal. |
48;5;0 to 48;5;255 | Background color (256 colors ANSI). TODO to test |
So, for example, if you want to keep grep’s defaults, but you prefer having matches underlined instead of bold, you can do the following:
export GREP_COLORS='ms=04;31:mc=01;31:sl=:cx=:fn=35:ln=32:bn=32:se=36'
The only thing we changed is the ms capability; from ms=01;31 to ms=04;31. Here’s the result:
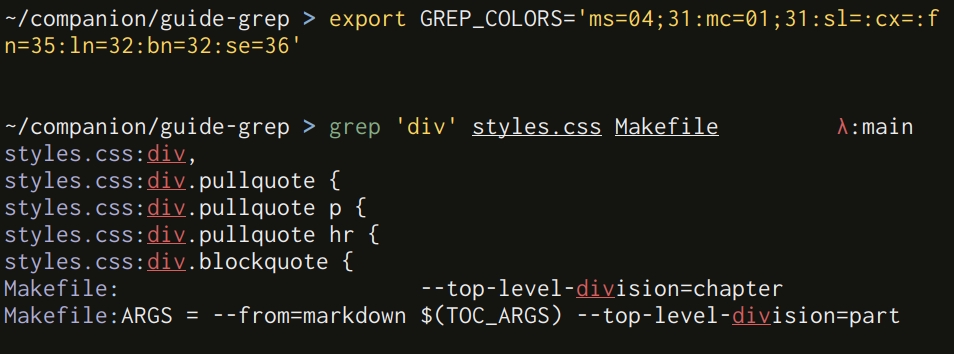
You can see that the matches div are now underlined.
Regular Expression Engines
As we saw at the very beginning of the section, the pattern you give to grep is in fact a regular expression (regex). Let’s look again at the following example:
grep 'div' styles.css
There is no metacharacter in the pattern here, so grep will try to match the literal div in the file styles.css. If you want to know more about regexes and their metacharacters, I’ve written an article about that.
The default regex engine used by grep is the Basic Regular Expression engine (BRE). It’s not the best regex engine out there; in my opinion, it’s better to use the more common Perl Compatible Regular Epression (PCRE). This is something which is specific to GNU grep; BSD grep, for example, doesn’t allow you to use this engine.
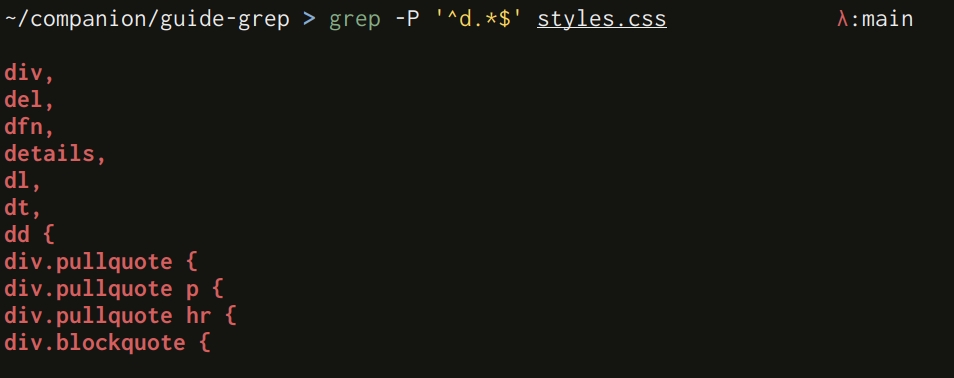
To use the PCRE engine, you can simply add the option -P to your commands. For example:
grep -P '^d.*$' styles.css
Here’s the result:
Again, if you want to always use the PCRE engine, you can create another alias:
alias grep="grep -P --color=auto"
Lovely.
Case Insensitive Matches
By default, grep will try to match your pattern in a case-sensitive manner; if you give to grep some lowercase characters, it won’t match their uppercase counterparts. If you prefer having case insensitive matches instead, you can use the -i option.
For example, let’s try the following in the companion project:
grep 'reset' styles.css
It won’t give you any result. But the following will:
grep -i 'reset' styles.css

Simple and effective. Again, if you want grep to be case-insensitive by default, you can add the option to your alias. You know the drill by now.
The Deprecated GREP_OPTIONS
Some resources on the Internet will recommend you to use the environment variable GREP_OPTIONS to set some default options to grep, instead of creating aliases.
But this option is deprecated for years, and for good reasons: if you run some third party shell scripts using grep, your default options will apply, something the original author can’t foresee. It can have unfortunate consequences.
I would recommend never setting GREP_OPTIONS but creating aliases instead; they’re not expanded in scripts by default.
Modifying The Output
It’s time to see how to modify grep’s output depending on your needs. This is most useful when you just want to pipe the output of grep to the input of another CLI which only accept a specific input.
We can also change the entire output to display a totally different kind of information (like the number of matches for example, instead of the matches themselves).
This section is not about filenames which could (or could not) be in the output. The next section is specifically dedicated to that.
Inverting the Matching
If you want to invert the match, that is, to only output the lines which are not matching the pattern, you can use the option -v as follows:
grep -v 'div' styles.css
The result:
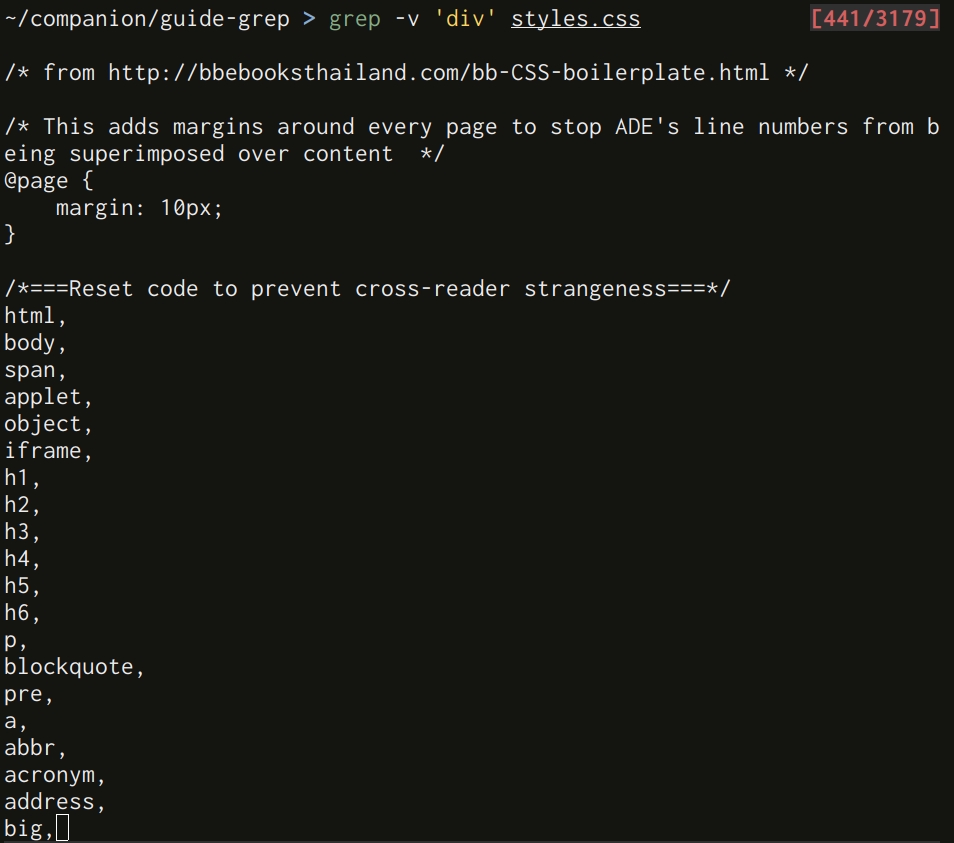
You basically output the entire file except the lines matching the pattern div.
Output Only The Matches
It can be useful to only output the match instead of the whole line. You can do that with the option -o:
grep -o 'div' styles.css
The usual result:

Not very useful in that case, but it works as expected nonetheless.
Output Line Numbers
If you to prefix your matching lines with the line numbers, you can add the -n option:
grep -o -n 'div' styles.css
Here’s the fantastic result:

Only Output the Number of Matches
What if we only want to output the number of matches? We could pipe grep output to something like wc for example:
grep 'div' styles.css | wc -l
But this is not necessary. To count the number of matches, we can use grep with the -c option:
grep -c 'div' styles.css
The output:

Summary: Modifying the Output
Here’s a summary of every option we’ve seen in this section:
| Option | Description | Example |
|---|---|---|
-v | Invert grep’s output: output the lines not matching the pattern. | grep -v 'div' styles.css |
-o | Output only the matches. | grep -o 'div' styles.css |
-n | Add the line numbers to the output. | grep -n 'div' styles.css |
-c | Only output the count of matches. | grep -c 'div' styles.css |
Managing Filenames in the Output
As we already saw, the filename will appear in the output if you give more than one file to grep. We can also manipulate these filenames thanks to a couple of options.
Hiding all Filenames from the Output
To hide all filenames, you can use the -h option. For example:
grep -h 'div' styles.css Makefile
The result you’ve been waiting for:

Because we give more than one file to grep, the output should have included the filenames if we didn’t add the -h option.
Always Output Filenames
If you want to always output the filenames before the matched lines, you can use the option -H. Notice that it’s the inverse of the -h option (which always hide the filenames). Many CLI use the uppercase counterpart of an option to invert it.
Here’s the usual example:
grep -H 'div' styles.css
The result:

Without the -H option, the filename wouldn’t have been displayed here since we only give one file to grep.
Only Output Filenames
What if we only want to output the filenames, and nothing else? To do so, we can use the -l option:
grep -l 'div' styles.css Makefile README.md
The result:

We give three files to grep, but only two match the pattern here.
Only Output Filenames Without Matches
Let’s invert our output once more: what if we only want to output the filenames where the pattern doesn’t match? To do so, we can use the -L option (again, the uppercase -L is the inverse of the lowercase -l). For example:
grep -L 'div' styles.css Makefile README.md
The expected result:

Summary: Managing Filenames in the Output
Let’s make a summary once more. Here’s what we’ve seen in this section:
| Option | Description | Example(s) |
|---|---|---|
-h | Always hide the filenames in the output. | grep -h 'div' styles.css Makefile |
-H | Always display the filenames in the output. | grep -H 'div' styles.css Makefile |
-l | Only output the filenames where the pattern is matched. | grep -l 'div' styles.css README.md |
-L | Only output the filenames where the pattern doesn’t match. | grep -L 'div' styles.css README.md |
Adding Some Context to the Output
By default, grep will output the entire line where the pattern is matched. But to understand the data we’re working with, we might also need to display some context: the lines before and after the matches.
It’s very useful when parsing any kind of log for example, to get everything we need (like the error message or the Git comment).
These options accept a value, to specify how many additional lines we want to display.
Output the Lines After The Match
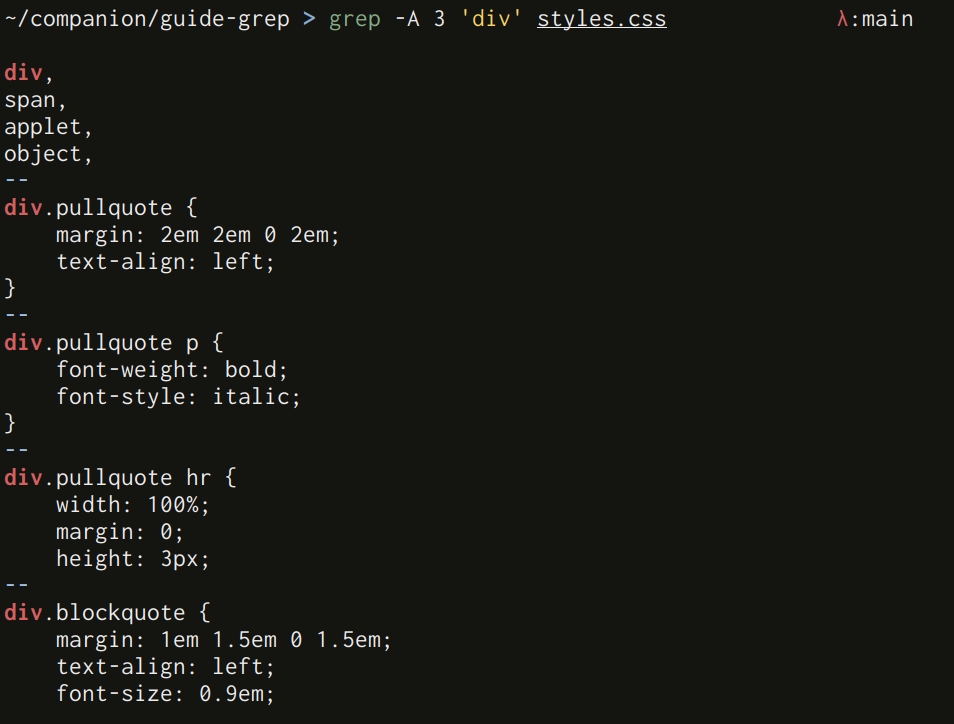
To output the lines after the matches, we can use the -A option:
grep -A 3 'div' styles.css
The output:
Output the Lines Before The Match
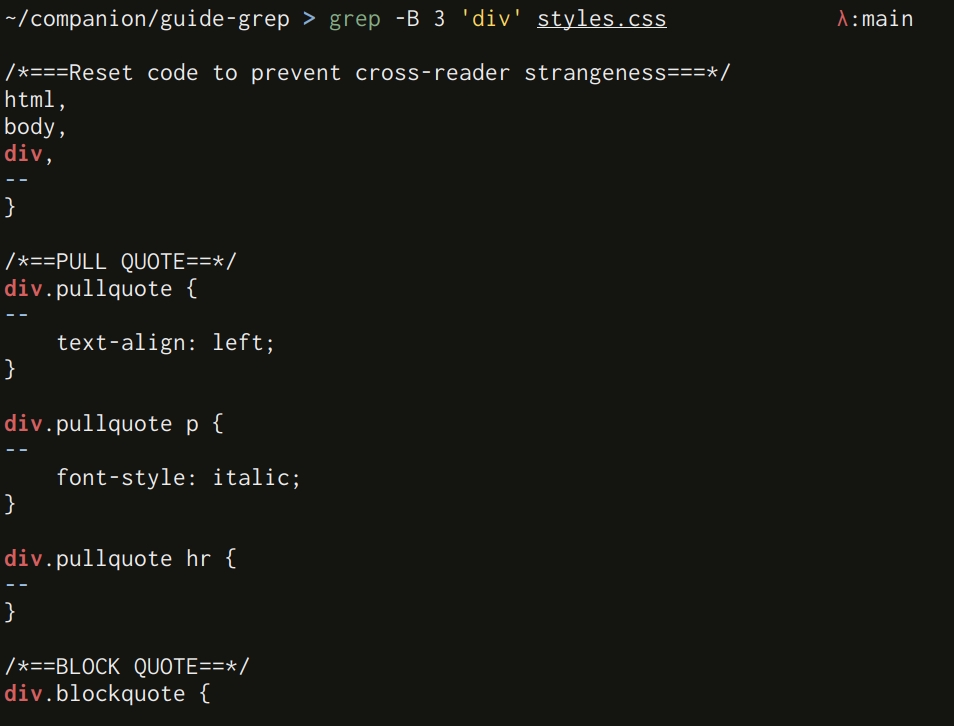
Similarly, if you want to output the lines Before the match, you can use the option -B:
grep -B 3 'div' styles.css
Here’s the expected result:
Output the Lines Before And After the Match
You can even output the lines before and after the match (for a full context) with the -C option:
grep -C 3 'div' styles.css
The magical output:
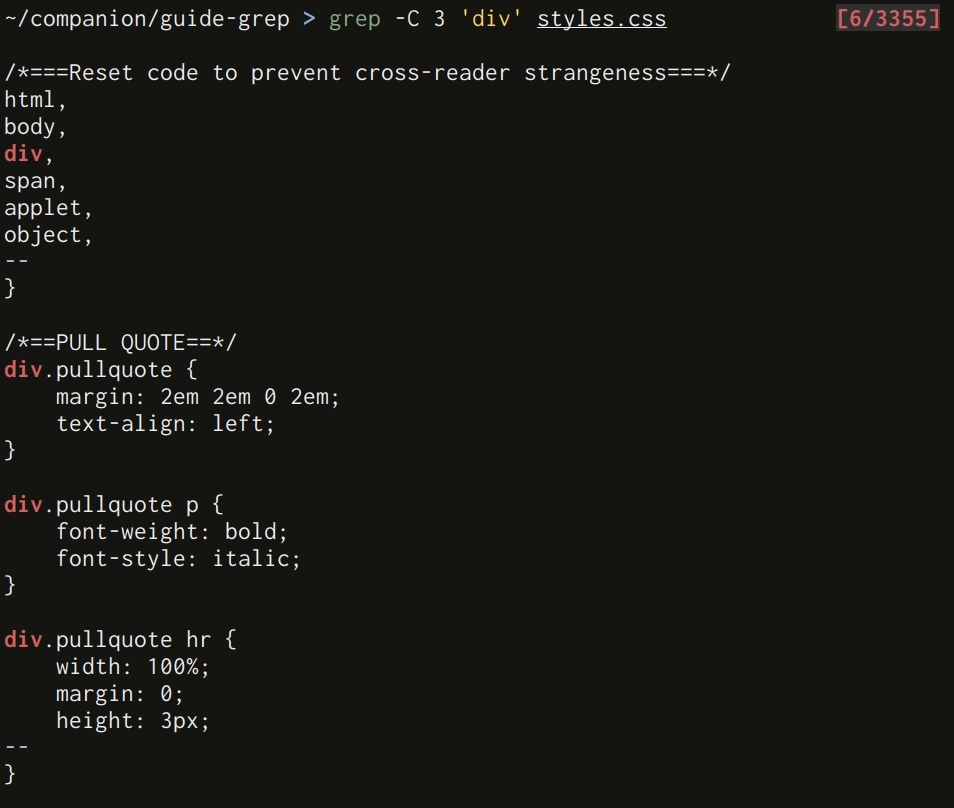
This is equivalent to the following command:
grep -A 3 -B 3 'div' styles.css
Summary: Adding Some Context to the Output
Let’s recap what we’ve seen in this section:
| Option | Description | Example(s) |
|---|---|---|
-A <value> | Output <value> lines after the lines matching the pattern. | grep -A 3 'div' styles.css |
-B <value> | Output <value> lines before the lines matching the pattern. | grep -B 3 'div' styles.css |
-C <value> | Output <value> lines before and after the lines matching the pattern for a full context. | grep -C 3 'div' styles.css |
There’s an easy mnemonic to remember these 3 options: After, Before, and Context makes… ABC.
Including or Excluding Files
What about including or excluding files from grep’s parser? We can use two options with GNU grep to do so.
Excluding files
In this article, we always gave the exact files we wanted to parse with grep. What if, instead, we want to parse everything except some specific files? To do so, we can use the --exclude option:
grep 'div' --exclude='Make*' $(find . -type f)
The result:

The command $(find . -type f) output every file (excluding the directories) for grep to parse them; I wrote another article about find if you’re interested to know how it works.
Since we exclude any file beginning with Make here, grep will parse every file from our companion project except the Makefile.
Including Files
It’s great to exclude the files we don’t want to parse, but what about only including the files we need? You might have guessed it, we can use the option --include to do so:
grep 'div' --include='*.css' $(find . -type f)
The usual output:

Remember: if you want to hide the filenames in the output, you can use the option -h.
Summary: Including and Excluding Files
It was a short section, but it still deserves its own recap:
| Option | Description |
|---|---|
--exclude <value> | Exclude the files <value>. Globs can be used here. |
--include <value> | Include the files <value>. Globs can be used here. |
Piping grep: A Small Overview
This part is not really interesting if you’re used to pipe CLIs in your shell, but I include it here in case you don’t really know how to pipe another CLI output to grep’s input.
Instead of giving files to grep to parse them, we can directly give the output of a command to grep’s input. The goal: filtering the output of your first command with grep.
For example, if I run ps (a CLI to output the processes running), I get this:
    PID TTY          TIME CMD
   2026 pts/9    00:11:36 nvim
   2431 pts/11   00:01:11 hugo
   2584 pts/10   00:00:01 tmuxp
   3009 pts/18   00:00:01 nvim
   3241 pts/20   00:00:17 taskell
   3484 pts/22   00:00:11 taskell
   3663 pts/21   00:00:00 nvim
What if I only want the lines matching the nvim pattern? We can run the following then:
ps -a | grep "nvim"
The character | is a pipe: it gives whatever output from the left command to the input of the right command. It means that we pipe here the output of ps -a to the input of grep 'nvim'.
Here’s the result:
   2026 pts/9    00:11:36 nvim
   3009 pts/18   00:00:01 nvim
   3663 pts/21   00:00:00 nvim
ripgrep: An Alternative to grep
As we saw throughout this article, grep is a very useful tool. But it’s also an old tool; it doesn’t really consider the other usual tools we use in a modern development workflow.
For example, most developers use Git nowadays to manage their projects. Yet, there is no easy way for grep to exclude the files ignored by Git (the filenames written in the .gitignore file).
To fix this problem and other shortcomings, there are many alternatives to grep available out there. The one I use most often is ripgrep (or rg). It offers nice functionalities and improvement compared to grep:
- If no file is given, it parses all files recursively; useful in case you don’t have globs like
**in your shell, or if you don’t want to use another CLI (like find). You can also specify the depth of the recursion easily. - It’s faster than grep. If your grep commands take too much time, switching to ripgrep will often improve the performances significantly.
- It filters automatically the files specified in some specific ignore files (like
.gitignore, or even.rgignorespecific to ripgrep), making it easier to exclude the files you don’t care about. - It can do some string substitutions on the spot; no need to pipe grep to a more convoluted tool (like sed) to replace one string by another.
- It can be directly configured via a configuration file without the need to create aliases.
Appealing, isn’t it? That said, I still think that knowing how to use the OG grep is useful. It’s likely you won’t find the modern grep alternatives on remote servers or docker containers for example, where grep can be a life savior. Additionally, if you know how to use grep, you won’t have any difficulty to grab one of its alternative.
Indeed, if you’re used to grep, it will be easy for you to pick up ripgrep. To drive the point home, here are some equivalent commands using both grep and ripgrep. I would recommend you to play with them to get a feeling of the differences:
# rg display the line numbers by default
grep -n 'div' styles.css
rg 'div' styles.css
# The -N option hide the line numbers
grep 'div' styles.css
rg -N 'div' styles.css
grep -P '^d.*$' styles.css
rg -P -N '^d.*$' styles.css
grep -v 'div' styles.css
rg -v -N 'div' styles.css
# By default, rg will add a heading for filenames instead of a prefix
grep 'if' template/*
rg -N --no-heading 'if' template
# By default, rg will parse every file recursively if none is given
# rg also ignore every filename written in .gitignore or .rgignore
grep --exclude="$(cat .rgignore)" 'div' $(find . -type f)
rg -N --no-heading 'div'
grep --exclude="$(cat .randomignorefile)" 'div' $(find . -type f)
rg -N --no-heading --no-ignore --ignore-file='.randomignorefile' 'div'
For the last example, --no-ignore will not ignore the filenames written in the common ignore files (like .gitignore or .rgignore), but we add afterward the option --ignore-file to ignore everything written in the .randomignorefile (a file I made up).
Other Alternatives
There are many other alternatives to grep. Here are two more which have slightly different usage:
| CLI | Description |
|---|---|
| ripgrep-all | Similar to ripgrep, except that you can parse many types of files: PDF, ebooks, office documents… |
| ugrep | Very fast grep-like CLI, apparently even faster than ripgrep. It also offers a TUI to search in your files. |
If you know more alternative adding some unique spin to the grep experience, don’t hesitate to let a comment at the end of this article.
We Need to grep Everything!
If you prefer watching videos instead of reading this article, most (but not all) of the good tips provided here are also available on YouTube:
What did we see in this article?
- The general syntax of grep is
grep [options...] 'pattern' [files...]. The patterns are regexes. - You can create aliases to give some default options to grep:
alias grep="grep -P --color=auto"is a good example, to always have colors in your output and always use the PCRE engine for your regexes. - We can modify the output easily with some options: inverting the matching, output only the pattern matched, and so on.
- We can also modify the output regarding the display of filenames.
- We can include or exclude some files to grep with
--includeand--exclude. - We can add some contexts with the options
-A,-Band-C; that is, displaying the lines before and/or after the pattern matched. - There are many alternatives to grep, like ripgrep or ugrep for example.
Don’t forget that there are multiple summaries in this article for you to quickly find the options you want when working with grep. Don’t worry if you can’t remember all of them for now; the more you’ll use them, the more you’ll memorize them.