This is a boring morning for every employee of MegaCorpMoneyMaker, the famous E-commerce. You are no exception: only dragging yourself out of your bed to crawl to your office required some superhuman efforts.
Dave, your colleague developer, loudly explain to an intern what she should do to connect to one of the company’s Kubernetes cluster. “So, now, you need to open your virtual shell for your terminal to request information from your console using Bash. Does it make sense?”.
Mesmerized by the nonsensical discourse of your colleague, you begin to wonder what’s the deep purpose of your life. Suddenly, this question found a clear answer: you see Davina, another of your colleague, stand up, take a Banjo from nowhere, and begin to sing a poem, like a troubadour lightening the ignorance of some middle-age peasants.
Once upon a time, as far as I can tell, There was the console, the terminal, and the shell. Let me tell you the story of these divine tools, For you to stop looking like ignorant fools.
Everybody gathers around Davina to hear her story. Her music sounds ancient and magical, and they soon have the feeling to slide in an ancient time…
Why does Davina want her colleagues to know more about the virtual consoles, the terminal, and the shell?
I don’t know any developer who doesn’t use a terminal, a shell, and some CLIs. I definitely use them all the time. They are the central building bricks of my Mouseless Development Environment.
So, since it’s so useful, let’s look a bit deeper what’s this shell, console, and terminal. More precisely, we’ll see, in this article:
- The legacy of physical teletypes in Unix-based systems.
- What are virtual consoles (TTY).
- What are pseudoterminals.
- What’s the shell.
- How to customize a terminal.
This article is the result of a reader asking me to write about the terminal. Don’t hesitate to subscribe to the newsletter to ask me what you’d like to read in The Valuable Dev!
In this article, I’ll mostly speak about terminals in the context of a Linux-based system; that said, they can also be applied to Unix-based systems at large (including macOS).
Strap on in the time machine, this will be a wild ride. The terminal carry a lot of baggage from devices of forgotten eras, so let’s come back in time!
From the Telegraph to the Video Terminal
Internet wasn’t only the result of some military project in the 70s. As far as history can remember, humanity was always compelled to send long distance messages. Many different cultures tried different ways to do so: smoke, pigeons, or even drum beats.
One of the biggest accomplishment in this quest was the invention of the telegraph. That’s our first stop to understand why the Unix terminal is an intertwined set of different ideas glued together.
The Telegraph
The history of the telegraph goes back from the 17th and 18th century. At that time, there were already some ways to send telegraphs on long distances! The technology jumped forward in the 18th century: during the french revolution, there was suddenly an urgent need for the telegraph; after all, the French monarchy (and the king’s head) was on the line. That’s why the telegraph expanded quickly in France first, and then in Europe.
To send a telegram, you needed two persons on each side of the line (emission and reception): the operators. At the time, it was not possible to send messages in plain text, so the operators had to encode them; for example in the famous Morse system, but not only.
Let’s say that you’re a respectable citizen from Berlin in the 19th century, and you want to send a telegram to your best friend in Paris. You would need to go to the telegraph office in Berlin, and give your message (in plain text) to the operator there. He would encode it, and send it to Paris. There, a second operator would decode your message, write it somewhere, and give it to Dave, your best friend.
There were many types of telegraph invented throughout the 18th and 19th century. The most famous was the electric telegraph, but there were many other variants too; it eventually led to the invention of the telephone.
For example, there were also the optical telegram, the helograph telegram, even wireless telegraphy was a thing.
The Teleprinter, Teletype, or TTY
Throughout the decades, the traffic of telegrams increased worldwide. Many were thinking about possible solutions to automate the whole process. The need for trained operators able to encode and decode messages were getting bigger and bigger, leading to the invention of the teleprinter.
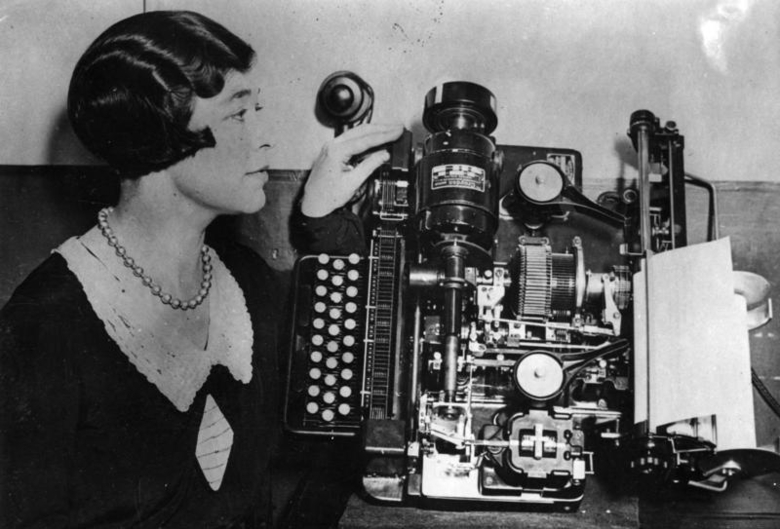
As you can see, it was a physical device composed of a keyboard and a printer. With a teleprinter, you could type your message in plain text; it would then be encoded automatically, and sent. On the other side, a teletype could decode the message, and print it.
With the adoption of the teleprinter, the Morse system wasn’t the best code to send messages anymore; it wasn’t really machine friendly. That’s where the Baudot code entered the chat: each character had the same length, making it easier for the teleprinters to handle. It could also encode more characters! Five bit sequential of binary code, allowing 32 (2^5) possible characters in your messages. Even better: a “shift” key (or FIGS, for “figure shift”) was allowing numbers and special characters in the messages for the first time.
The Baudot code had also some early control characters (CR). For example, let’s say that you wanted to send a message, but you made a typo: you could use the “DEL” code to say that you wanted the character before it to be deleted. When the message was received, the teleprinter in charge of printing back the message wouldn’t print the “DEL” code, but instead it would skip the character just before it. That’s also why control characters are also called non-printable characters.
In 1925, the Baudot code was improved, and became the Murray code. More control characters were included: the carriage return for example (CR), to move the carriage (the “cursor” of the teleprinter) back to the left margin of the same line. You also had the line feed (LF), to advance the carriage to the same column of the next line.
These control characters are still used today. We’ll come back to them below in this article.
Fast-forward to the early 1930: a new network, composed of teleprinters, was invented in Europe (more specifically in Germany): the telex. AT&T launched its own version in the US in 1931. It was the cheaper way at the time to send long-distance telegrams. The speed of the network was measured in baud; in Europe, it was of 50 bauds, which was around 66 words per minute.
And guess what: you can still display the speed in baud of your terminal. It doesn’t mean anything anymore, but it shows the roots of the terminal coming back to the teleprinter.
In 1961, the American Standard Association created a new code for teleprinters, called the ASCII code. It’s a 7 bits codes, allowing to send bigger messages than with the Baudot (or the Murray) code, even including the luxury of lowercase and uppercase letters.
It was a great step toward standardisation, too. Until then, many different codes to encode messages were still used, even if some more than others. With the ASCII code, teleprinters in the US were using the same set of characters to send messages.
That said, the control characters themselves weren’t properly standardized. Two different teletypes could use different characters for the same control.
The telegram began to decline as soon as 1920, mostly because of the telephone. It’s estimated that, at its peak, in 1929, there were about 200 millions telegrams sent worldwide! Journalists never stopped using them until the 90s, when the Internet came into the picture.
Last thing: the teleprinter is the official name for the device. Teletype was a major brand producing teleprinters, that’s why “teletype” became a synonym of “teleprinter”. The abbreviation of teletype is TTY.
Computers and TTYs
In the middle of the 50s, there were already a bunch of computers available. These mainframes were massive computers taking a lot of space, many of them built by IBM. At that time, teletypes were all over the world, so it was only natural to use them to send messages to a computer.
Early computers could be categorized in two types:
- Batch computers (IBM and Univac computers).
- Interactive computers (like the Bendix G-15, the Librascope LGP-30, or the IBM 610).
To run a bunch (a batch) of programs together on batch computers, you needed to:
- Type your code using a teletype on punch cards.
- Feed the different punch cards to the mainframe computer as input.
- Get the output on a punch card.
- Insert this output into a tabulating machine, to decode it in a human-readable format.
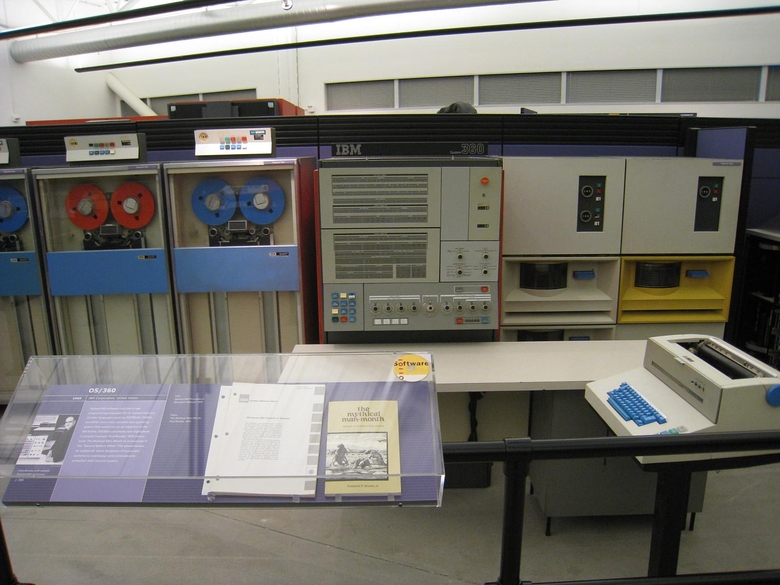
The rise of interactive computers changed this workflow. You could then directly send your input to the machine using a teletype. More specifically, you needed to:
- Type your input on a teletype, which would be printed on paper for you to see what you were typing.
- The teletype was also sending the characters (including the control characters) to the computer.
- The computer was sending back the output to the teletype, which was also printed on paper (or punch cards).
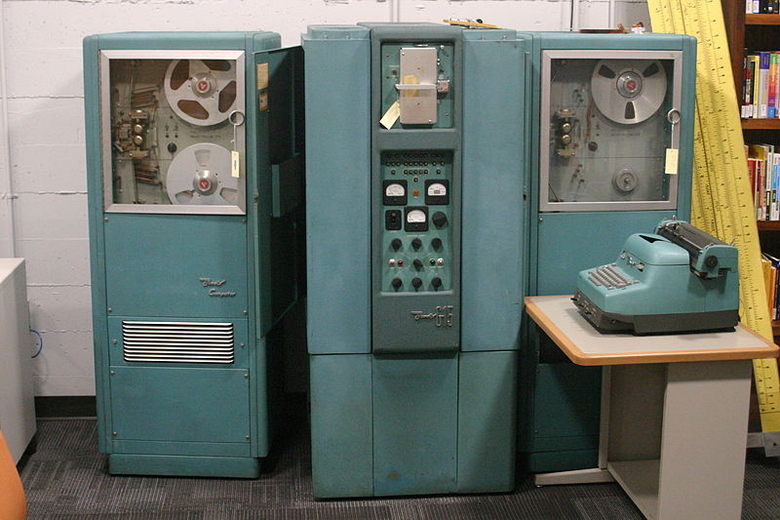
These teletypes were connected to the computer using a serial port. Two wires were necessary: one to send the data to the computer, another one to receive it.
The ASR-33 (introduced in 1963) was a widely used teletype at the time. It was one of the first teletype using the ASCII standard, which was also the common encoding used by more and more “minicomputers” to transmit information. These computers are not mini by today standards, but they were smaller than massive mainframes.
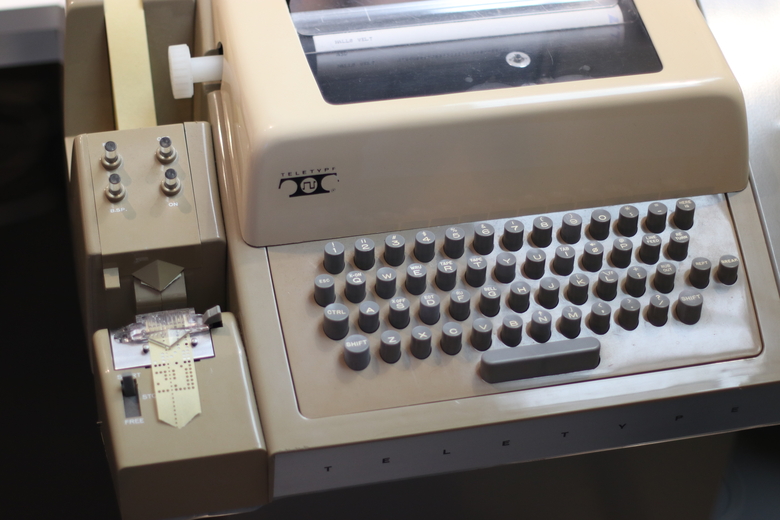
As we saw, there were a handful of control characters available to do some “non-printable” actions. Now that teletypes were interacting with a computer, the users needed more control characters. The ASCII introduced the ESC key, and “control sequences” were invented. Instead of a single key for performing an action, a sequence of key were used, often prefixed with the ESC character. That’s why control sequences are also called escape sequences. This prefix was not a standard however, but widely used nonetheless.
It’s interesting to note that, at the beginning, the interactive computers would only allow one user to connect and interact with it. In 1959, the development of time-sharing allowed multiprogramming. Later, the concept of time-sharing shifted: it meant then that multiple users could interact to a single computer at the same time.
We’ve here the origin of the command-line interface: a text-only interface allowing users to communicate with a computer. Everything was printed, input as well as output.
What if we replace the sheet of paper with a screen?
Video Terminals
In 1960, IBM began to experiment with a new way to interact with computers, the “glass teletype”, a terminal with screen. The video terminal was born.
It was similar to a teletype. Instead of printing the input and output (which was slow and, due to the mechanical nature of teletypes, quite loud), a video terminal would display everything on a screen.
This video terminal was still an external device to the computer itself, including both a screen and a keyboard. Like most invention, it was very expensive at the beginning, limiting its adoption. The price dropped in the middle of the 70s, and the success of Video terminal rose.
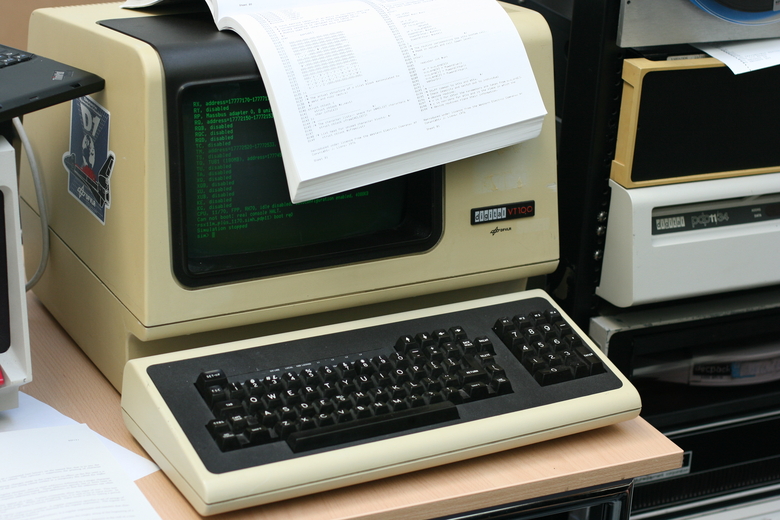
The video terminals were also called “console”, or simply “terminal”.
The DEC VT100 (for Video Terminal) was one of the most popular choice. Released in 1978, it was one of the first video terminal supporting a new set of escape sequences, the ANSI escape codes. When connected to a computer, this terminal was called a “controlling terminal”, because it was controlling the computer.
Unix System in AT&T
Now that we have video terminals to use on minicomputers, what did the programmers in the 70s did with them?
The Birth of Unix
In 1970, Dennis Ritchie and Ken Thompson develop the UNIX operating system on a DEC PDP-11, a popular minicomputer series at the time. It was an interactive computer, easier to program than the competitors. It influenced not only modern CPUs (like the Intel x87) but also other operating systems, like the CP/M, the ancestor of MS-DOS (the base of Windows for many years).
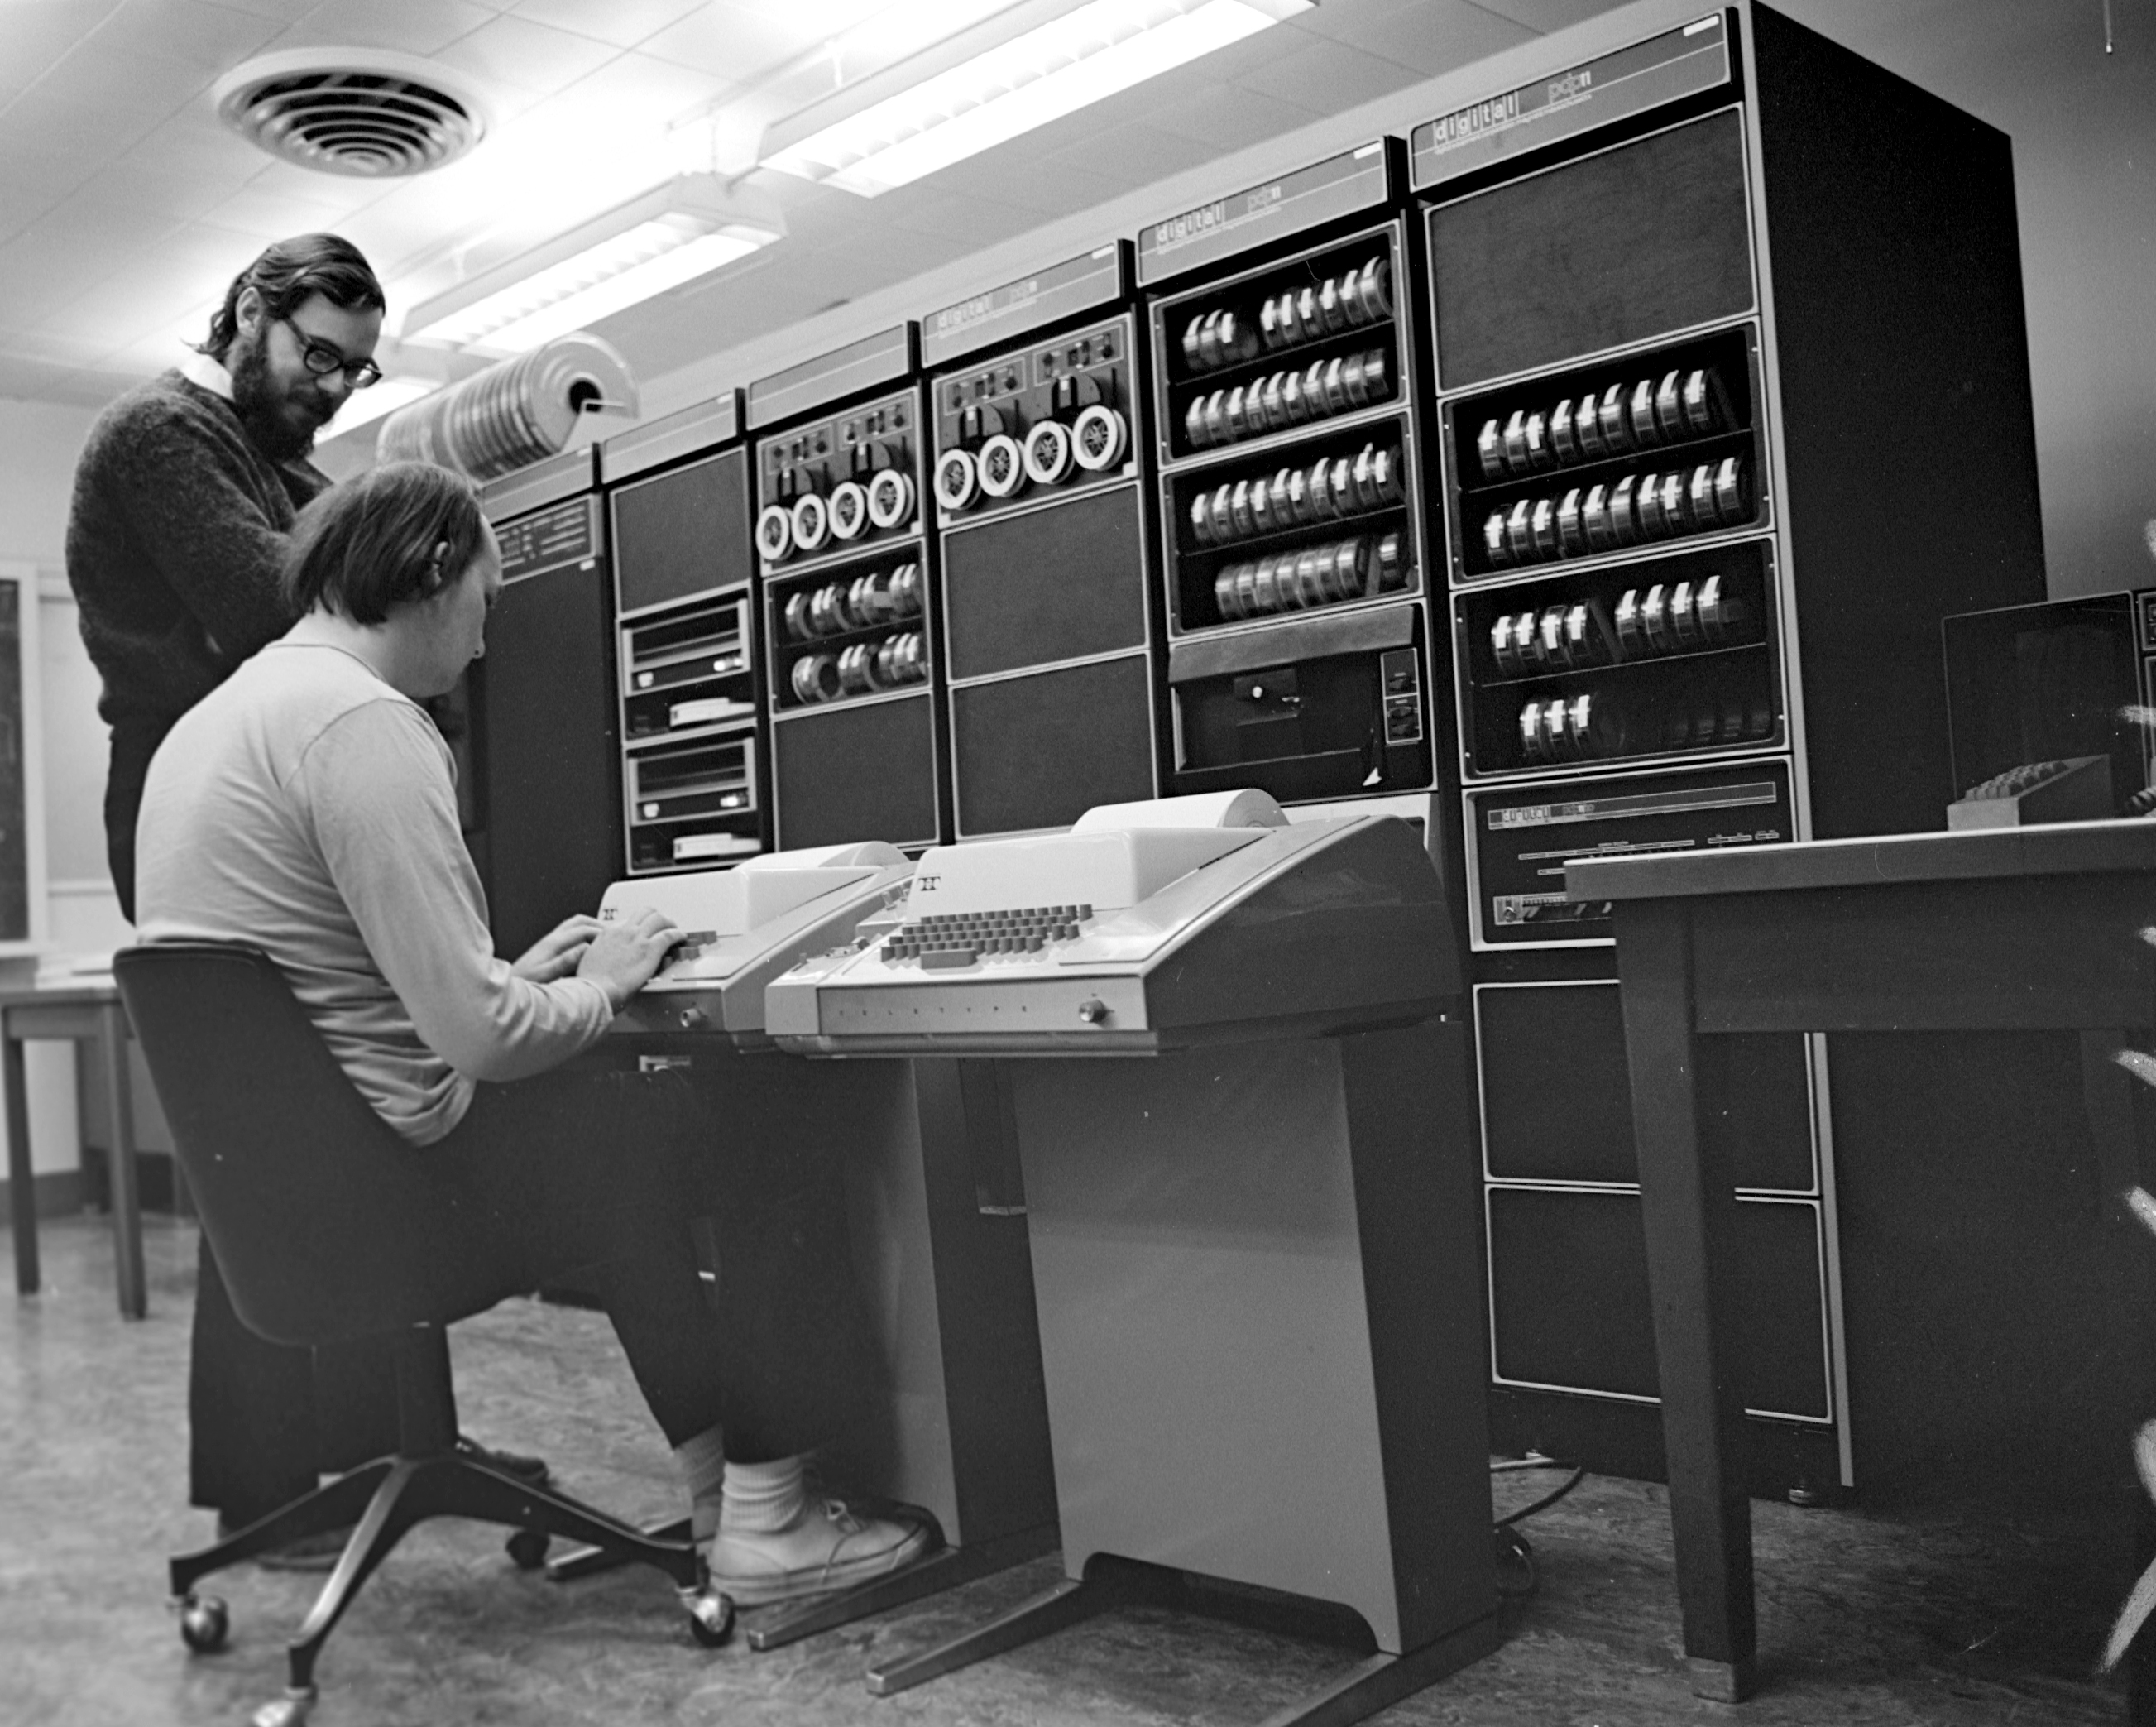
Unix was created for AT&T needs, and their creators were influenced by the long time they spent on teletypes.
With Unix, almost everything is represented by a file. External devices are no exception: when you were connecting a teletype (or a video terminal) to a machine running Unix, it would represent the device with a file prefixed by “tty”. This file was an interface between the external terminal and the computer.
For example, in a multi-user context, if three teletypes were connected to your computer, you would have the file /dev/tty0 assigned to the first one, /dev/tty1 to the second one, and /dev/tty2 to the third one.
The file /dev/tty always represent the current terminal.
We can now transmit commands to the computer thanks to these external devices. But how the computer knows what to do with them?
It’s what the shell is good for.
The Shell
When you think about it, teleprinters and video terminals were quite dumb:
- They take your sweet input, and display it.
- They pass it to the computer.
- Some program, running on the computer, interprets the input, and send back the output.
- They display the output to your impressed face.
But what program are we talking about, here? What can interpret our commands? That’s where the shell shines.
Imagine that you’re an AT&T employee working with Dennis Ritchie. You’re writing ls on your video terminal, and send it to the computer by hitting the control character Carriage Return (the ENTER key on our modern keyboards). The shell, running on the computer, receives the command, interprets it, and understands that you want to execute the program ls. As a result, it might send some system call to the kernel (we’ll come back to that soon), creates a new process ls (a process is simply a program being executed), and send back the output of this process to the terminal to display it.
The shell can also interpret a list of commands described in a shell script.
Here’s what you always wanted to see: a fancy 3D animation followed by Brian Kernighan explaining casually what the kernel and the shell are to one another, with the keyboard of a fancy video terminal on his laps, the feet on the desk. That’s charisma right there.
If you can, watch the whole video. It’s awesome.
Types of Terminal Emulators
As time went on, with the development of OS (Operating Systems) like Unix and CP/M, the video terminals began to be abstracted away.
With computers getting smaller and smaller, more and more “personal” (the first widely adopted microcomputer was the Apple II in 1977), why needing a physical external device when you can emulate the system in software?
That’s where the video terminal began to be emulated.
When we speak about terminal nowadays, we think about a piece of software which allows us to write some commands. This terminal is an emulation, trying to recreate, in software, the video terminal. That’s why we speak about terminal emulators. This emulation is still called the TTY device, somehow making teletypes still part of our lives.
We can distinguish two families of terminal emulators: virtual consoles and pseudoterminals.
Virtual Consoles (TTY)
Before graphical interfaces took over the computer world, virtual consoles were the only ways to interact with these OSes growing in popularity. A virtual console is a terminal emulator running in the kernel.
Imagine that you just threw away your big video terminal. You only have a screen and a keyboard attached to a computer now, and this time the computer take your input from your keyboard, and display the output on the screen. No need of a video terminal anymore!
Now, when you start your computer, you’re first greeted with a login screen. You log in with your favorite user, and then the shell will display a prompt, inviting you to enter some commands. You can type these commands in your virtual console and press ENTER, to send them to the shell, where they will be interpreted. The output appears on your screen. You can even start other processes, like your favorite editor, which is obviously Vim.
But, without a video terminal, what allows us to type our commands, see them on a screen, and pass them to the shell (or any of its child process), and only when we type ENTER? What is giving our output back? Your virtual console of course! Even if you threw away your actual physical console, it’s still there, doing the same job as before.
When you log in a virtual console, a shell process will be attached to the output of the terminal emulator (specifically the file representing the terminal, something like /dev/tty, as we already saw). The shell will give you a prompt, and everything you type will go directly to the TTY device.
The virtual console itself runs in the kernel, and your shell as well as its child processes run in user land. Wait, what?
Kernel and User Land
Let’s go on a tangent here. If you didn’t know, there are two “spaces” where programs can run: the kernel and user land (also called user space).
Part of the kernel’s job is to ensure that no program will mess up with the hardware, and also that one program can’t access the memory of another one. To ensure this level of security, most programs you run as a user will be a process in user land.
If the process needs to ask the kernel to use some hardware (like writing on the hard disk, or using the RAM, for example), it will send a system call to the kernel. The kernel will receive the system call, enable some more protections (on the CPU for example), and it will try to handle what the process wants.
Linux Virtual Consoles
Virtual consoles fell out of fashion when desktops were being implemented in most common OS (but in very different ways). No need to have a text-based interface anymore: with desktops, we have now fancy windows, icons, status bars, and the like.
As a result, not many OSes give us the chance to interact with virtual consoles nowadays; but Linux-based systems still have them.
The Linux kernel was developed with multi-users in mind from the beginning, giving us multiple virtual consoles where different users could log in in parallel.
When you launch some Linux distribution (like Arch Linux, by the way) without any desktop installed, you’ll be greeted with a logging screen.
- First, a program called “getty” runs.
- The process “getty” gets a TTY; this process is then replaced with another one called “login”, to give the user a login prompt.
- After logging in, the user will get write permissions on the file representing the TTY (
/dev/tty<tty_number>). - The file
/etc/passwdwill be read to decide what shell to run for this specific user. The shell will then replaces the login process. - The shell will display a prompt for the user to type commands.
If you have a desktop (like Gnome, KDE, i3, or whatever else), there will be a display server (like X or wayland) called after getting the TTY (or after the login process starts), which will in turn display the desktop. The TTY itself still runs under the hood.
I was saying that Linux-based systems allow us to have multiple virtual consoles. With most Linux distros, if you’re in a virtual console already, you can use the ALT key with one of the F-key (like F1, F2… up to F6, or more) to switch between them. If you’re already running a desktop on top of one of your TTY, you can use CTRL+ALT followed by one of the F-key.
On Linux, the files /dev/tty1 to /dev/tty63 represents the different virtual consoles you can access (you might not be able to open all of them, depending on your configuration). You can actually play with that: if you’re logged with the same user on the TTY 1 and 2 (to have write permissions on the /dev/tty files), you can send some data from the TTY 1 to the TTY 2 by running:
echo "I'm the first TTY" > /dev/tty2
If you switch to the second virtual console, you’ll see your input displayed on the screen.
If you try to read the files themselves (using cat for example), you won’t see anything in there; they’re just used as interface to pass data from terminals to processes, and from processes to terminals.
You can also use the CLI chvt to switch to different virtual consoles: chvt 2 will switch to the second virtual console for example.
Even nowadays, virtual consoles can be handy for different reasons:
- If your graphical desktop freeze or crash, you can switch to another virtual console to debug the problem.
- If your graphical desktop crash at startup, you can also switch to a virtual console and try to solve the problem.
- If you access a remote server (or an embedded device) without any graphical interface, you’ll only have the virtual console to work with; better knowing how it works in these cases!
The virtual console is considered as the controlling terminal of all the process you can run in it (including the shell). You can display the controlling terminals for each process by using one of the following command:
tty- Show the actual controlling terminal.who- Show all the users logged in a controlling terminal.ps -eF(with GNU ps),ps aux(with BSD ps) - Show the controlling terminals of all processes (if any); look at the “TTY” column.
Not all group of processes have a controlling terminal. For example, daemons started when the OS boots don’t need any terminal to control them; they operate on their own.
Here’s a diagram showing the first virtual console of a Linux-based system. We can imagine that you’ve typed “vim” in the first virtual console, followed by the ENTER key:
If virtual consoles are not as popular as before, what kind of terminals we run in our windows, on our comfy desktops?
Pseudoterminals, or PTY
A virtual console is running in the kernel. A pseudoterminal (or “PTY”) is a terminal running in user land. Any terminal you launch from a graphical interface (like a desktop) is a PTY.
How does it work?
Let’s imagine that you open three terminal emulators in your favorite graphical environment, like xterm for example. On Linux-based systems, it will first open the file /dev/ptmx, which will then open two other files:
- A file descriptor for the PTY master (or “PTM”).
- A file
/dev/pts/<pty_number>for the PTY slave (or “PTS”). The<number>is incremented each time you launch another pseudoterminal.
To come back to our example, the third pseudoterminal you open will be represented by the PTS file /dev/pts/3 on Linux-based systems. The PTM is only a file descriptor (a number in a table); you won’t find it in the filesystem.
Then, a shell will be attached to the PTS, receiving its input from the PTS file. When you’re trying to run some commands in your pseudoterminal, the input will first flow from the PTM to the PTS, and then from the PTS to the shell. The shell’s output will take the same path back.
Here’s a diagram summarizing the process:
A pseudoterminal is similar to a virtual console, with two important differences:
- The terminal is running in user land, not in the kernel.
- Instead of having one file (
/dev/tty) representing the whole TTY device, you have two (the PTM and the PTS).
Coming back to physical teletypes, we’ve seen above that they were connected by a pair of wires to a computer. You can see the master file “PTM” as the emulation of the physical pair of wire connecting the physical terminal to the computer. Here, it connects the terminal in user land to the kernel. The slave file “PTS” has the same role as the TTY (/dev/tty<tty_number>) file of a virtual console: it’s an interface between the terminal and the different processes using our commands, like the shell.
Again, you can use the CLI tty in your terminal emulator to see what PTS file you’re writing to. You can also try to write to another PTS (for example echo "hello third PTY" > /dev/pts/3), you’ll see in the third pseudoterminal what you’ve written.
How Terminal Emulators Work
Now that we’ve seen the basics of teletypes, consoles, virtual consoles, shells, and the pseudoterminals, let’s look at how terminal emulators work in general.
We’ve represented the TTY device as a black box until now, but there’s more to it. We can divide it in three parts: the TTY core, the line discipline, and the TTY drivers.
The TTY core
The TTY core responsibility is to get the user input and pass it to the line discipline. You have the choice between multiple line disciplines; the one by default normally handle input from a terminal, but some others can manage mouse or whatever else can be plugged to a serial port.
The Line Discipline
Thanks to the TTY core, you can write some commands in your terminal. These commands are then send to the line discipline, which can also intercept control characters and escape sequences. For example, as we already observed, the control sequence “^[[3~” will be send to the line discipline if I hit the key “DEL” in my terminal; as a result, the line discipline will get back your input with a character deleted. This control sequence is also called escape sequence, because the character ^[ represents the ESC key.
We were saying above that a terminal is quite dumb. The line discipline makes it a bit smarter, because it already interprets some of your input. It’s a very basic editor, if you will.
The line discipline can be in different modes:
- The canonical mode: the input is processed when a line is terminated by a carriage return (a control character), created when you hit
ENTER, or a line feed. At that point, the command will be passed to the process in the foreground. - The noncanonical mode: each character is directly sent to the line discipline and the TTY drivers, and to the foreground process. No need of line feed anymore.
- The cooked mode: the terminal “cooks” (transform) the input you give to the terminal, as well as the potential output from the processes attached. It’s basically the canonical mode will all the default control characters and control sequences enabled.
- The raw mode: the line discipline doesn’t do anything anymore. It just passes whatever you give to the TTY drivers. It’s basically the noncanonical mode with many control characters and control sequences disabled.
Many applications (like Vim for example) use the “noncanonical” mode to get all the characters you type directly, instead of waiting for you to hit ENTER to finally receive them. That’s how Vim can display the characters you’re typing one by one.
With early computers, you didn’t have much choice: you had to use the line discipline. Its buffer was useful to store characters, instead of using the very limited RAM. But nowadays, with our crazy computers, it’s not a problem anymore.
TTY Drivers
When the line discipline is done processing your input, your command (or individual characters, depending on the mode you’re in) is then sent to the TTY drivers. They will interact with the hardware directly (the role of a driver), and also pass the different characters to the processes, like the shell.
The possible output goes through the TTY drivers again, then back to the line discipline, which might convert some other control sequences. For example, on Unix systems, it converts the line feeds (LF) from the output to the combo carriage return/line feed (CR/LF), simply because the line feed only advance the carriage return to the same column on the next line, not on the first column on the next line.
We’ll see how to change the behavior of the line discipline in the next section. For now, here’s a diagram for a whole TTY device:
It’s more or less the same for a pseudoterminal, except that the line discipline sits on top of the PTS.
Customizing the Terminal Emulator
Now that we have a high level view on what the TTY device is doing, let’s see how to customize your terminal experience.
Line Discipline and TTY Drivers Settings
We can actually configure our line discipline and TTY drivers with the command stty. Let’s try to run the following in a shell:
stty -a
It will output the different settings you can configure for the line discipline of any terminal emulator (pseudoterminal or virtual console).
Here’s what I get on one of my pseudoterminal:
speed 38400 baud; rows 45; columns 105; line = 0;
intr = ^C; quit = ^\; erase = ^?; kill = ^U; eof = ^D; eol = <undef>; eol2 = <undef>; swtch = <undef>;
start = ^Q; stop = ^S; susp = ^Z; rprnt = ^R; werase = ^W; lnext = ^V; discard = ^O; min = 1; time = 0;
-parenb -parodd -cmspar cs8 -hupcl -cstopb cread -clocal -crtscts
-ignbrk -brkint -ignpar -parmrk -inpck -istrip -inlcr -igncr icrnl ixon -ixoff -iuclc -ixany -imaxbel
iutf8
opost -olcuc -ocrnl onlcr -onocr -onlret -ofill -ofdel nl0 cr0 tab0 bs0 vt0 ff0
isig icanon iexten echo echoe echok -echonl -noflsh -xcase -tostop -echoprt echoctl echoke -flusho
-extproc
Let’s look at the output in details, beginning by the first line:
speed 38400 baud; rows 45; columns 105; line = 0;
The speed is another artifact from the bygone era when physical teletypes were ruling the computer world. The rows, columns, and line of the terminal are not always accurate either.
The second and third lines are more interesting:
intr = ^C; quit = ^\; erase = ^?; kill = ^U; eof = ^D; eol = <undef>; eol2 = <undef>; swtch = <undef>;
start = ^Q; stop = ^S; susp = ^Z; rprnt = ^R; werase = ^W; lnext = ^V; discard = ^O; min = 1; time = 0;
They describe the different control characters and control sequences you can configure. For example intr = ^C means that you can use the control sequence CTRL+c to send an interrupt signal.
We can configure these control sequences as we see fit. For example, if we want to send an interrupt signal with CTRL+r, we can run:
stty intr ^R
You can use here the hat notation for representing CTRL+r: a carret ^ represents here the CTRL key. You can also type the actual control character ^R by first hitting CTRL+v, followed by CTRL+r.
In general, you can use CTRL+v followed by a control character to get its raw value.
You can also run stty --help to learn more about all these bindings. Here are the most interesting to me:
| Control | Description | Default |
|---|---|---|
intr | Send an interrupt signal. | ^C (CTRL+C) |
eof | Send end of file, terminating the input. | ^D (CTRL+D) |
erase | Erase the character before the cursor. | ^? (BACKSPACE) |
werase | Erase the word before the cursor. | ^W (CTRL+w) |
kill | Erase the current line. | ^U (CTRL+u) |
susp | Send a stop signal (suspend a process which can be later resumed). | ^Z (CTRL+z) |
stop | Stop the output (including echoing what’s your typing). | ^S (CTRL+s) |
start | Start the output after it was previously stopped. Everything which was stored in the buffer is sent to the terminal. | ^Q (CTRL+q) |
You can also use undef to disable a control character. For example:
stty start undef
stty stop undef
Let’s go back to the output of stty -a. Next, we have a list of options:
-parenb -parodd -cmspar cs8 -hupcl -cstopb cread -clocal -crtscts
-ignbrk -brkint -ignpar -parmrk -inpck -istrip -inlcr -igncr icrnl ixon -ixoff -iuclc -ixany -imaxbel
iutf8
opost -olcuc -ocrnl onlcr -onocr -onlret -ofill -ofdel nl0 cr0 tab0 bs0 vt0 ff0
isig icanon iexten echo echoe echok -echonl -noflsh -xcase -tostop -echoprt echoctl echoke -flusho
-extproc
A minus before a setting means that it’s disabled; no minus means it’s enabled. Not all options are boolean, however. In that case, the minus will have slightly different meanings. You can look at the manual page of stty (by running man stty) to have more information.
The name of these settings are quite obscure. The first letter can help guess what they stand for: when the settings are about the output of the TTY, they will begin with an o. Same for input: they will begin with an i.
To disable settings, you can simply give them as argument to stty. For example:
stty -opost tostop
This will disable the setting opost, and enable the setting tostop.
Here are a couple settings of interest:
| Setting | Description | Default |
|---|---|---|
igncr | Ignore carriage return (the ENTER key). Great if you don’t want anybody to execute a command. You can still use a newline character for the same effect, by hitting CTRL+j. | -igncr |
opost | Let the line discipline post-process the output. | opost |
echo | Output your input characters back to the terminal. | echo |
ctlecho or echoctl | Echo control sequences in hat notation. | ctlecho |
onlcr | Transform the line feeds from the output with the combination of carriage return / line feed. | onlcr |
tostop | Stop background jobs that try to write to the terminal. | -tostop |
For example, to ignore carriage returns, you can run:
stty igncr
Now, you can’t send any command to your shell anymore… but you can still use CTRL+j to send a line feed control character, which is equivalent to the carriage return.
There are other “combination of options” we can use to disable or enable a bunch of options at once:
| Setting | Equivalent |
|---|---|
cooked or -raw | brkint, ignpar, istrip, icrnl, ixon, opost, isig, icanon, eof and eol with default values. |
raw or -cooked | -ignbrk, -brkint, -ignpar, -parmrk, -inpck, -istrip, -inlcr, -igncr, -icrnl, -ixon, -ixoff, -icanon, -opost, -isig, -iuclc, -ixany, -imaxbel, -xcase, min 1, and time 0. |
sane | -ignbrk, brkint, -inlcr, -igncr, icrnl, icanon, iexten, echo, echoe, echok, and -echonl. |
If you try to disable some of these options, they might be automatically reset after you type ENTER to send your command to the shell.
It’s because the line editor of your shell might reset some TTY options automatically, because it can’t work with (or without) these options.
For example, in Zsh, if I do the following:
stty -echo
stty -a | grep "echo"
The output will show me that the option echo is still enabled. It was disabled when I sent the first command to the shell, but then ZLE (Zsh’s line editor) enabled it again.
If you really want to enable or disable some settings without your shell’s line editor to interfere, you have two choices:
- Disable these options, but only for a couple of commands, all on the same command-line.
- Disable the line editor.
For the first, you can run for example the following:
stty -echo; cat -v
Here, the semi-column ; allows us to execute two commands on the same command line.
The option echo will be disabled for the new cat process (which means that you’ll only see the output of cat, not the input you’re giving to the terminal), but then when cat ends, ZLE will automatically enable echo back.
If you really want to only use the terminal editing power without any line editing, you can also turn down readline (for Bash) or ZLE (for Zsh) respectively with these commands:
bash --noediting
unsetopt zle
The first command will create a new Bash process with readline (Bash’s line editor) disabled, the second one will only switch off ZLE. To switch it back on, you can run setopt zle.
Last thing: we can also fetch the terminal settings for another TTY. For example, on Linux:
stty -a -F /dev/pts/1
If your system is Unix based, try the following:
stty -a < /dev/pts/1
A Selection of Terminal Emulators
It wouldn’t be fair to speak about terminal emulators without recommending some. Here are my favorites:
| Terminal emulator | Description |
|---|---|
| Urxvt | An old but fast terminal emulator. Can be extended with Perl plugins. |
| st | A very simple (and fast) terminal emulator. |
| Alacritty | A more modern, fast (GPU-accelerated) terminal emulator. |
| Kitty | A complete and fast (GPU-accelerated) terminal emulator which can do a lot. It can be extended with plugins. |
As you can see, I like fast and lightweight terminal emulators. This is a very short list, but there are many more available out there.
This Beast of Terminal Unraveled
That was quite a ride! Terminal emulators seem convoluted internally, mostly due to their long history. Some new terminal emulators try nowadays to go away from this legacy, but they’re not widely adopted yet.
What did we see in this article?
- Teleprinters (or teletypes, abbreviated TTY) were useful to encode and decode telegrams.
- When the first computers appeared, teletypes were used to send some input and receive output.
- Teleprinters were displaying input and output on paper. Video terminal were doing the same, but on a screen.
- As computers got more powerful, video terminals were emulated in software.
- There are two types of terminal emulators: virtual consoles and pseudoterminals.
- Virtual consoles are not available anymore in most OS, except Linux-based ones.
- A shell is a program interpreting the commands received from a terminal (physical or emulated one).
- A virtual console interfaces with the difference programs running (processes), including the shell, thanks to the file
/dev/tty<virtual_console_number>in Linux. - A pseudoterminal use two files; the one interfacing with the processes is
/dev/pts/<terminal_number>on Linux. - The CLI “stty” can help you configure your terminal, by changing the control sequences, or enabling / disabling some settings.
I believe that knowing how the terminal and most common shells work gives you an edge, especially when your terminal don’t behave as you want it to. This is a complex but particularly useful tool.